

Airwallex for Beginners: Simplify Your International Payments!

This beginner-friendly guide shows how to use Airwallex to send, receive, convert, and manage multiple currencies without the usual confusion, hidden fees, or banking headaches.
International payments don’t have to be complicated. This beginner-friendly guide shows how to use Airwallex without the confusion.
Do you have experience trying to pay your foreign vendor, get money from an international customer or make sense of all the different currencies in one of your spreadsheets? If so, then you are familiar with the pain: unpredictable bank charges, silent exchange rate "bites", and slow transferring money using paperwork. For many small teams, the real frustration is not just the cost, but the lack of clarity around where money is at any given moment and which payment took longer than expected. That uncertainty tends to grow as soon as you add a second currency or overseas partner.
In this guide, I will take you on a tour of what Airwallex is, and the many reasons why it is ideal for newbies dealing with global currency transactions; and show you how to do everything Airwallex offers (send, receive, convert and follow) with as little frustration as possible. This tutorial is meant to be used as a quick and simple guide to setting up an Airwallex account for freelancers, e-commerce business owners, startups, and small groups.
What is Airwallex?
Airwallex is an integrated financial system for all types of businesses that enables companies to process all aspects of their cross border activities through one single interface (i.e. you can hold all of the currencies your business operates with, convert currency as needed, send international wire transfers and track your business's spending across cards and expense reports). It effectively acts as a new generation of interface between your business and the antiquated banking rails; especially beneficial if your income and outgo are generated from different countries.
The key benefit of using Airwallex for most beginners is simply: less hassle when money crosses borders. Rather than having to go back and forth between your bank(s), card provider(s), and manual expense report systems, you can now centrally manage your international transactions and basic spend control.
Simple example: A U.S.-based startup earns its income in USD, needs to pay a contractor based in the U.K. in GBP, and another SaaS-based tool located in Europe in EUR. If you have a multi-currency set-up, you will be able to maintain your income in USD, convert the amounts you need to pay in GBP and/or EUR, and then pay those contractors or vendors from the same dashboard.
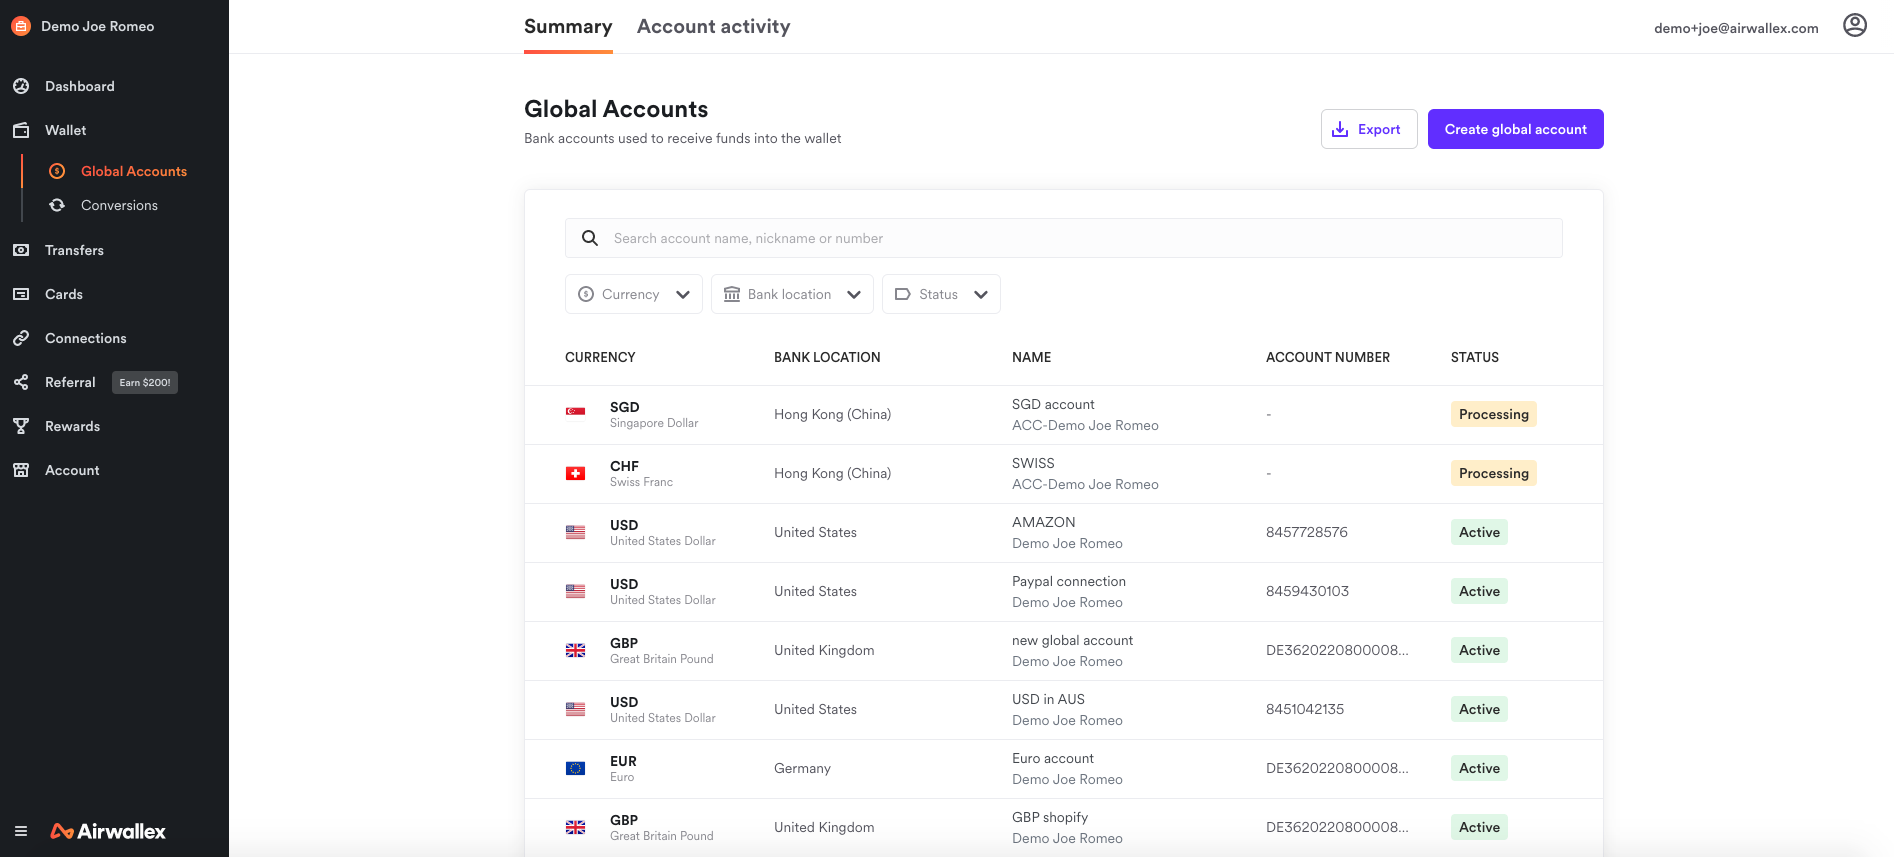
Why Should Beginners Use Airwallex for international payments & multi-currency cash management?
When you’re just starting out, you don’t need fancy treasury strategies, you need clean execution. Airwallex tends to click with beginners because it’s built around real-world workflows (get paid → convert → pay out → keep records), not banking jargon.
- Multi-currency accounts for clearer cash visibility: Hold balances in multiple currencies so you’re not constantly forced into conversions.
- Smoother international transfers: Pay suppliers and contractors abroad from one place, with tracking and a repeatable process.
- Local receiving details (where available): Getting paid can be as important as paying out, especially when clients prefer “local-style” transfers.
- Spend control for small teams: Issue cards, set simple limits, and reduce the “who bought what?” chaos.
- Scale-ready without being overwhelming: You can start simple, and later use advanced features (approvals, integrations, APIs) as you grow.
For beginners, the value proposition of Airwallex is based on the level of predictability and control that it provides. It gives you a clear path to handle money across borders without requiring you to learn banking concepts that you do not need to know at this time. You can confidently perform your day-to-day payments and still have room to add structure as your business becomes more complex.

Getting Started with Airwallex: Step-by-Step Guide
When you are just starting out, I would recommend taking the approach of focusing first on the foundation (security + wallets) and doing only one "test" transfer before transferring a larger volume. Airwallex is intended for businesses, and therefore you will need to provide documentation to prove that you have an eligible registered company to register for an account. (Airwallex specifically states they do not support personal accounts.)
Step 1: Create your Airwallex business account
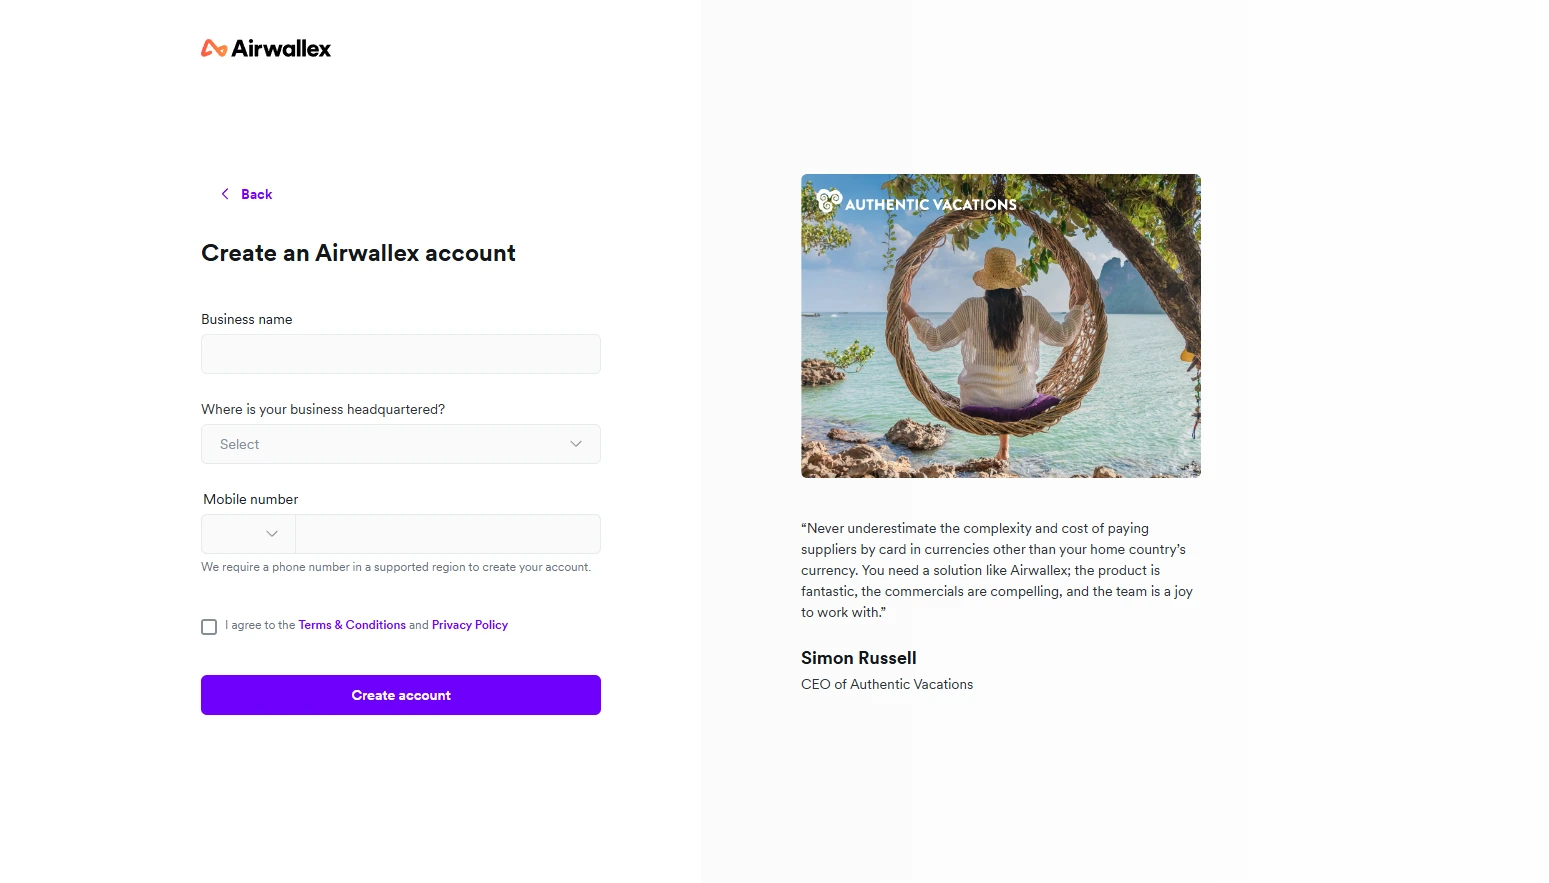
Register for your Airwallex business account, and select your business registration country. This may be important because some products and services may not be offered globally depending on the country in which you are registering your business.
- Use a company email you control (avoid personal shared inboxes)
- Enter your legal entity details accurately (you’ll match these during verification)
- Decide early who should be the admin (usually the founder/finance owner)
Once the account is created, your next milestone is verification, don’t treat it as a “blocker”, treat it as a standard fintech step.
Step 2: Complete verification (KYB) and lock down security
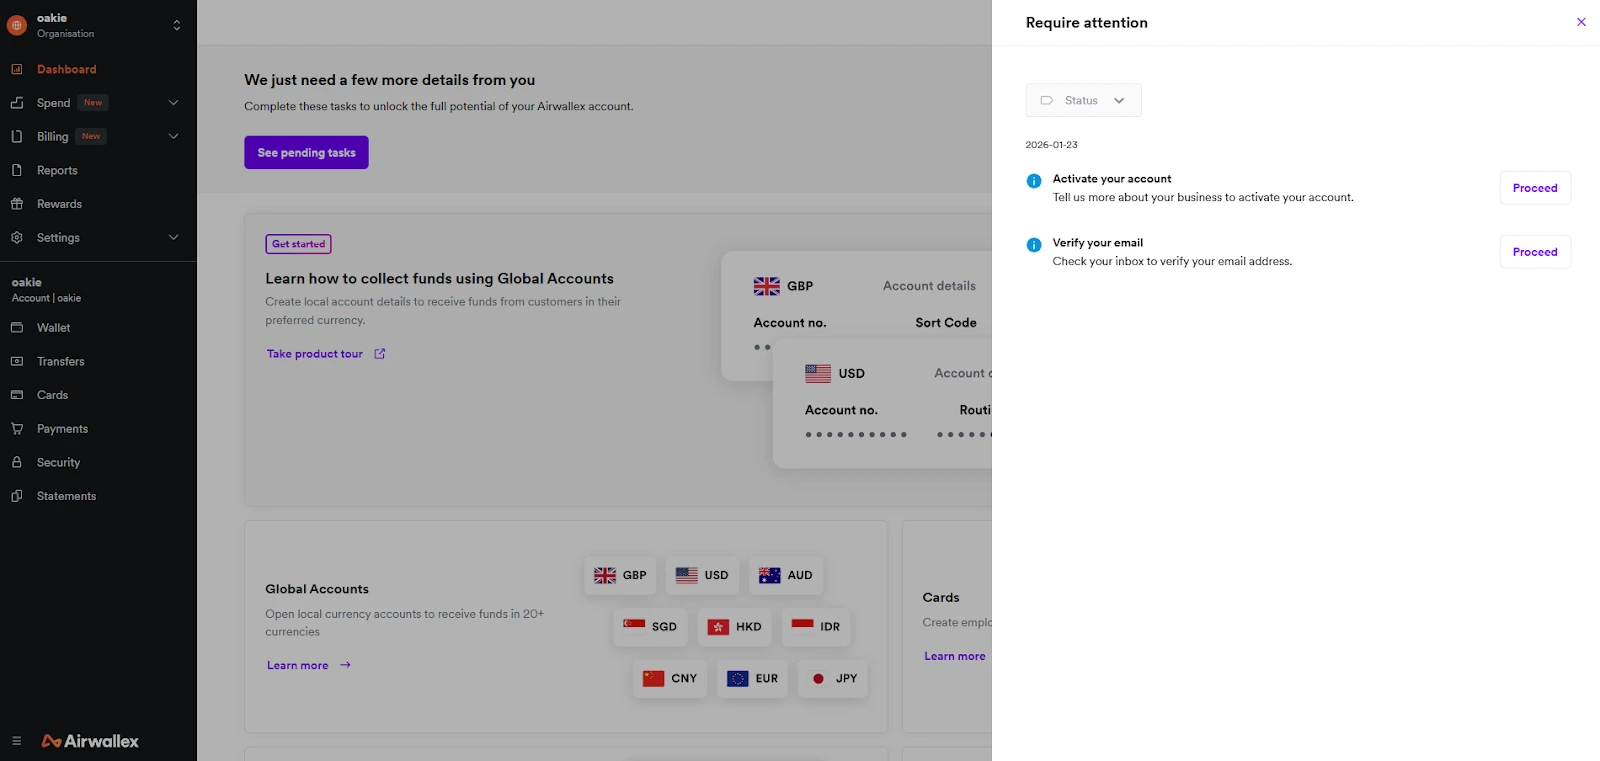
You'll need to go through Airwallex's business verification (KYB) process. Be prepared with all the necessary documentation and information about the people involved in your company. Activate as many security features as possible right away.
- Turn on 2FA for Admins
- If you add teammates later use Role-Based Access Control
- Keep a simple internal note of who has admin rights (you’ll thank yourself later)
After approval, you’ll be able to fully use wallets, transfers, and (depending on region) cards and expense tools.
Step 3: Open your first currency wallets (multi-currency account)
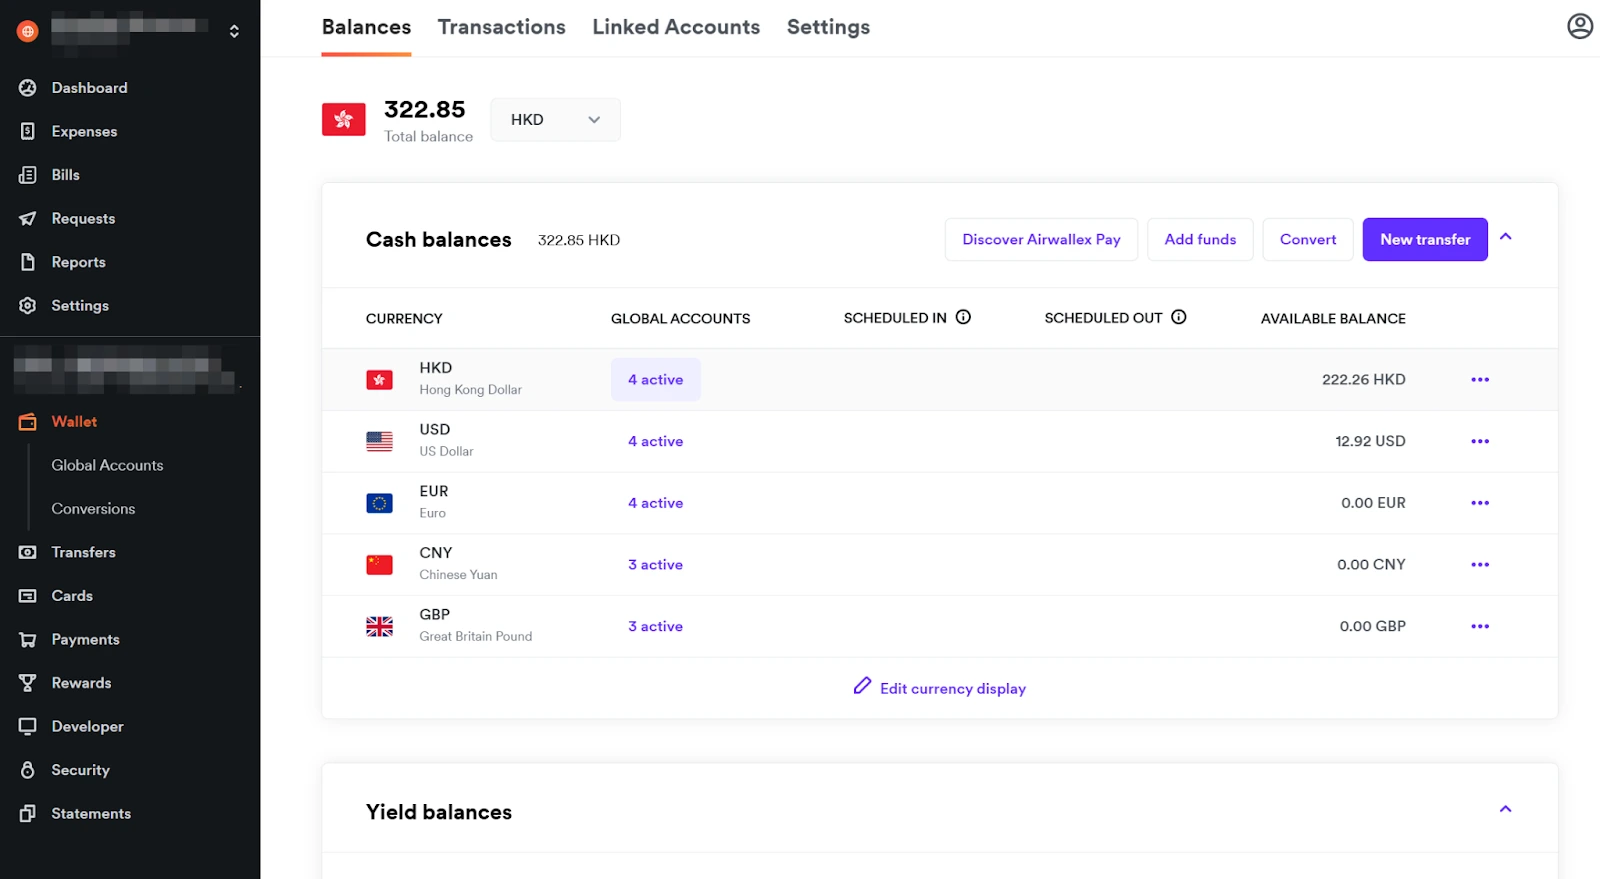
Create wallets for the currencies you require. New users typically open too many wallets and overcomplicate things. Start with your most commonly used currencies (typically 2-3) such as USD, EUR, and GBP, and then expand from there:
- Create wallets for incoming revenue currencies first
- Add payout currencies second (suppliers/contractors)
- Name wallets clearly (e.g., “USD – Client Receipts”, “EUR – Tools & SaaS”)
This is also where you begin to feel the main benefit: you’re no longer mentally converting everything back to your home currency every five minutes.
Step 4: Add a beneficiary and send your first international payment
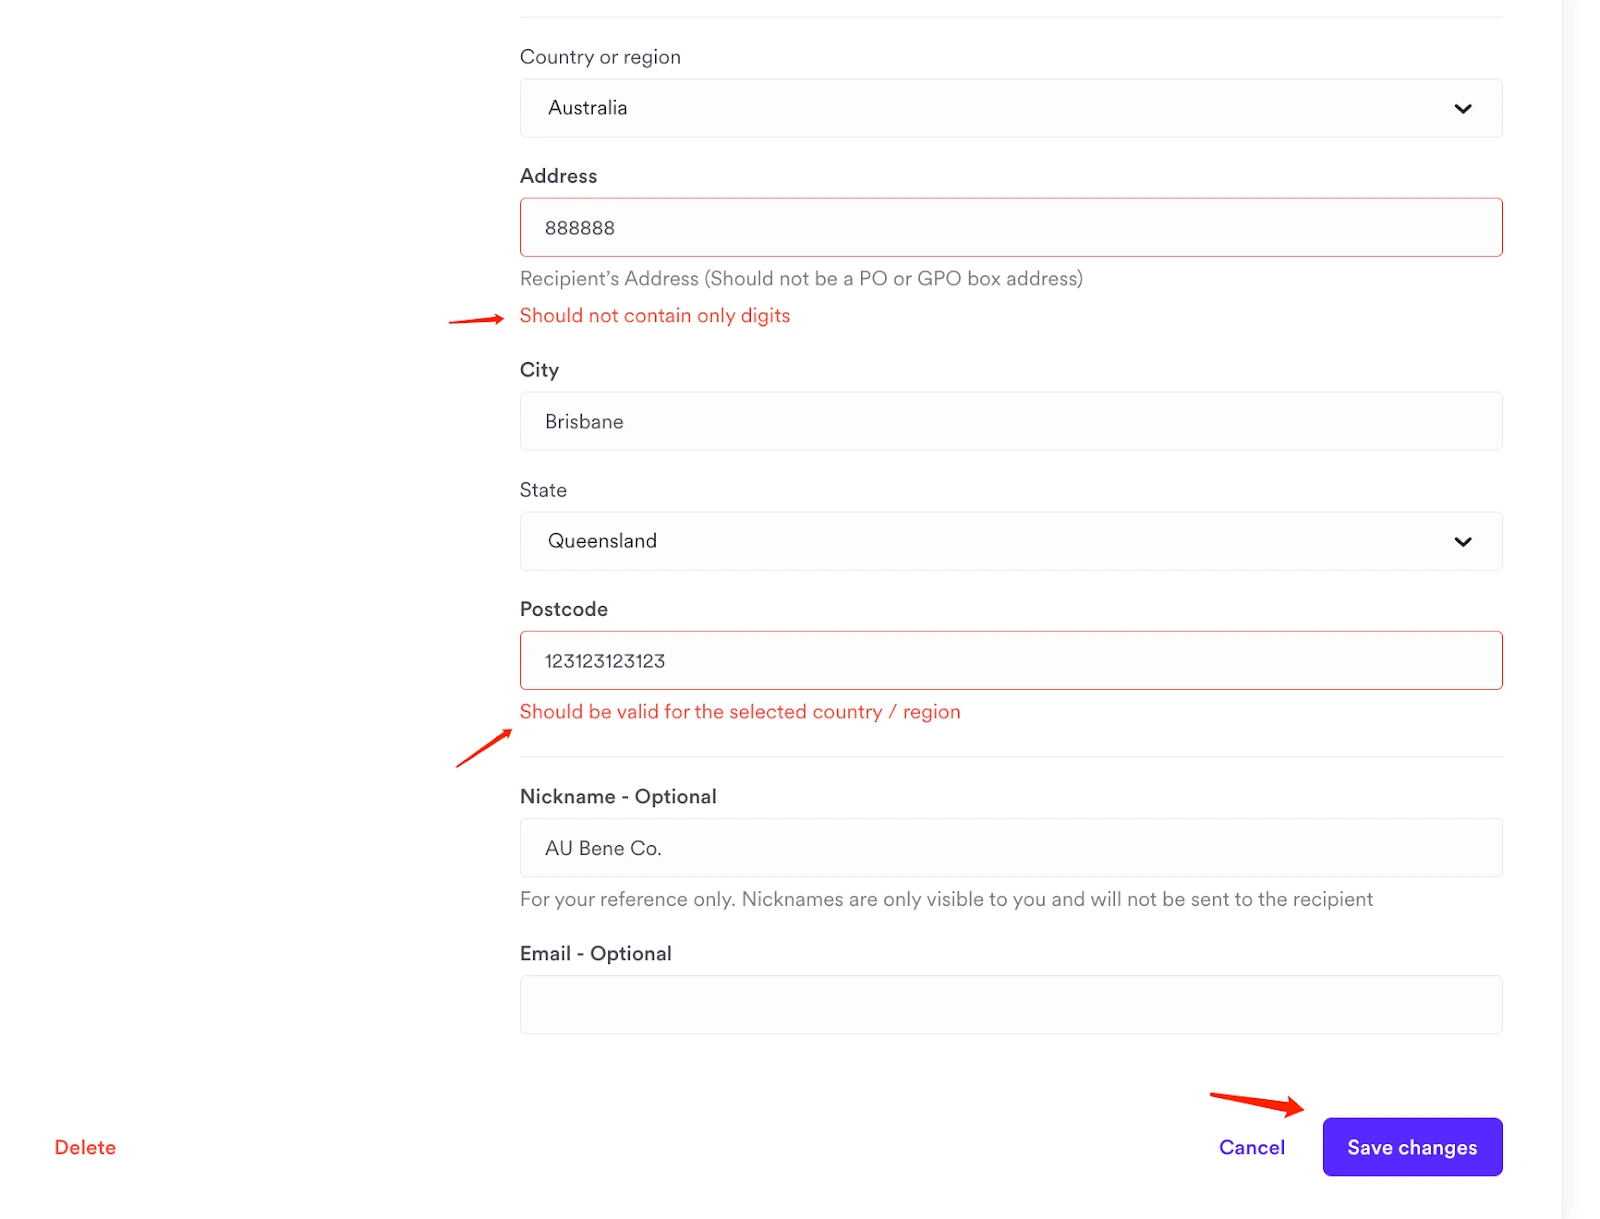
Prior to sending large amounts of money, perform a single small test transfer (a "hello world" transfer). The test transfer will validate the beneficiary details and your internal workflow.
- Add the recipient as a beneficiary (supplier/contractor)
- Select the payment currency and amount
- Review fees and FX (if conversion is needed)
- Confirm and track the transfer status
Common beginner mistake: mismatched beneficiary name/bank details. If the recipient is a business, use the exact legal name on their bank account.
Once you’ve done this successfully once, repeating it monthly becomes routine rather than stressful.
Step 5: Issue cards and set lightweight spend controls (optional)
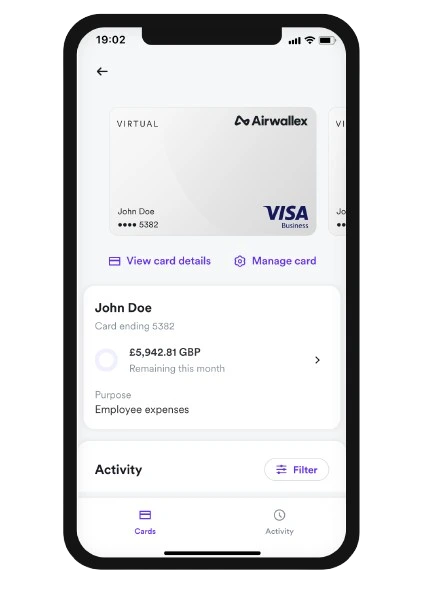
Cards can help to bring organization quickly for subscription payments or team purchasing without requiring you to become the "expense police". Card availability and features depend on your registered business location. Therefore, verify what is available for your area prior to proceeding. The Airwallex Help Center contains detailed information about card availability and features by location (US, UK, EU, etc.).
- Create a virtual card for online subscriptions (ads tools, SaaS, hosting)
- Set a monthly limit aligned with your budget
- Assign cards to teammates only when needed (and keep permissions tight)
If you plan to manage receipts and approvals, Airwallex supports expense workflows and mobile receipt capture, useful once you’ve outgrown “send me the receipt on Slack.”
How to use Airwallex for getting paid internationally with local bank details?
Many first-timers focus primarily on outbound payments; however, it is the inbound payments that determine the level of momentum. If your foreign client does not want to make an international card payment or has to deal with the friction associated with making international wires, you can sometimes provide foreign clients local receipt details for a specific currency with Airwallex (availability will depend on your country of operation as well as the type of product).
Here’s a clean beginner workflow:
- Choose the currency you want to receive (e.g., USD or GBP) and make sure that wallet is active.
- Locate your receiving details (local-style bank details when available) and copy them into your invoice.
- Add a payment reference rule (e.g., “Invoice #1042”) so reconciliation doesn’t turn into detective work.
- Match the incoming payment to the invoice using amount + reference + client name, then export/share the proof for accounting.
Pro tip: Put the same reference in (1) the invoice, (2) the client’s payment instructions, and (3) your internal records. It reduces “mystery deposits” dramatically.
How to use Airwallex for currency conversion (FX) without overpaying?
The reason that most beginners lose money quietly with FX is because they usually never have just one large fee - they usually have thousands of tiny fees. The key to developing a good habit regarding FX conversions is to always think about them as something you deliberately do instead of automatically doing all the time.
Let's say you receive USD, and you pay your contractor in GBP every month. Instead of converting funds whenever you want to make a payment, leave the funds in your USD account until you are ready to pay, then convert an agreed upon amount of funds from your USD account into the GBP that you will be paying your contractor in. On the dashboard of the Airwallex platform, you can usually select the source wallet you wish to convert from, select the target currency you are wanting to convert to, view the FX rate and the fees associated with the transfer, and confirm your transfer. Once confirmed, you would pay your contractor directly in the currency of their choice.
Two real-world things to watch out for when using Airwallex for FX conversions: First, when comparing FX costs based on "mid-market" rates, do not compare mid-market rates unless you know exactly which corridors you are comparing, what payment methods you are comparing, and when you plan to initiate each payment. Second, if you are making regular scheduled payments through Airwallex, make sure you build some sort of cushion into your schedule so that you are able to convert your funds at a less-than-optimal time, and therefore save yourself from over-paying.
How to use Airwallex for paying overseas suppliers and contractors?
This is the bread-and-butter use case: paying invoices abroad reliably, with a process your future self won’t hate.
A beginner-friendly routine looks like this:
- Collect the invoice and confirm currency + due date.
- Validate beneficiary details (especially if it’s a first payment).
- Decide your FX moment: convert now or hold until closer to payment date.
- Send the payment with a clean reference (invoice number).
- Save proof (confirmation + invoice + reference) for bookkeeping.
If your needs are different, it’s worth knowing your alternatives. For example, Wise and Payoneer are often considered for international transfers or getting paid from abroad, while Revolut is commonly compared for business cards and multi-currency usage. Airwallex itself is often evaluated alongside these tools.
Check out our comparisons:
How to use Airwallex for expense management (cards + tracking) as a small team
When there's more than one person spending money on behalf of an organization, the chaos begins: lost receipts, ambiguous category designations, and "Is this business related?" debates. Essentially, expense management is a visibility engine; it takes card purchases, receipts, approvals, and accounting exports and puts them all into one workflow.
One simple example of how to set up a basic system is to create a "two lane road". Lane one is company card spend (e.g., subscription services, tools, travel) where transactions are captured automatically. Lane two is out-of-pocket reimbursements (e.g., when teammates spend their own money) where they submit receipts for review and approval - often including accounting sync after approval.
Airwallex positions its Expense Management solution as a way to manage both company card expenditures and employee submitted reimbursements in one place with employees submitting receipts for reviews and approvals - often including accounting sync once reviewed and approved.
In practice, start small. Start with one virtual card to track all your company's subscription services and take a 10 minute weekly look at all those charges. When that works, you can add approvals, categorize those charges, and create reimbursement rules. By building your system in a series of steps (not creating a bureaucratic process), you will have created a working system.
How to use Airwallex for embedded finance & APIs (only if/when you need it)
If you’re a beginner, it's perfectly fine to pass over this part of the lesson on Day One, but it is good to know that there are additional API options available at Airwallex which will allow businesses to build financial services into their products.
- Example: A marketplace for e-commerce can onboard international sellers, keep their money in balance with Airwallex and make international payments for those sellers without having to establish their own banking infrastructure.
- When: The product development team exists and you have a high volume of transactions, you also want the experience of making a payment to be native to your application.
For most beginners, this section is more about awareness than action. It is useful to know that Airwallex can grow beyond manual payments into deeper product integrations when your business model demands it. Until then, focusing on the core workflows will deliver far more value than introducing technical complexity too early.
Paying your first overseas contractor with Airwallex (USD → GBP)
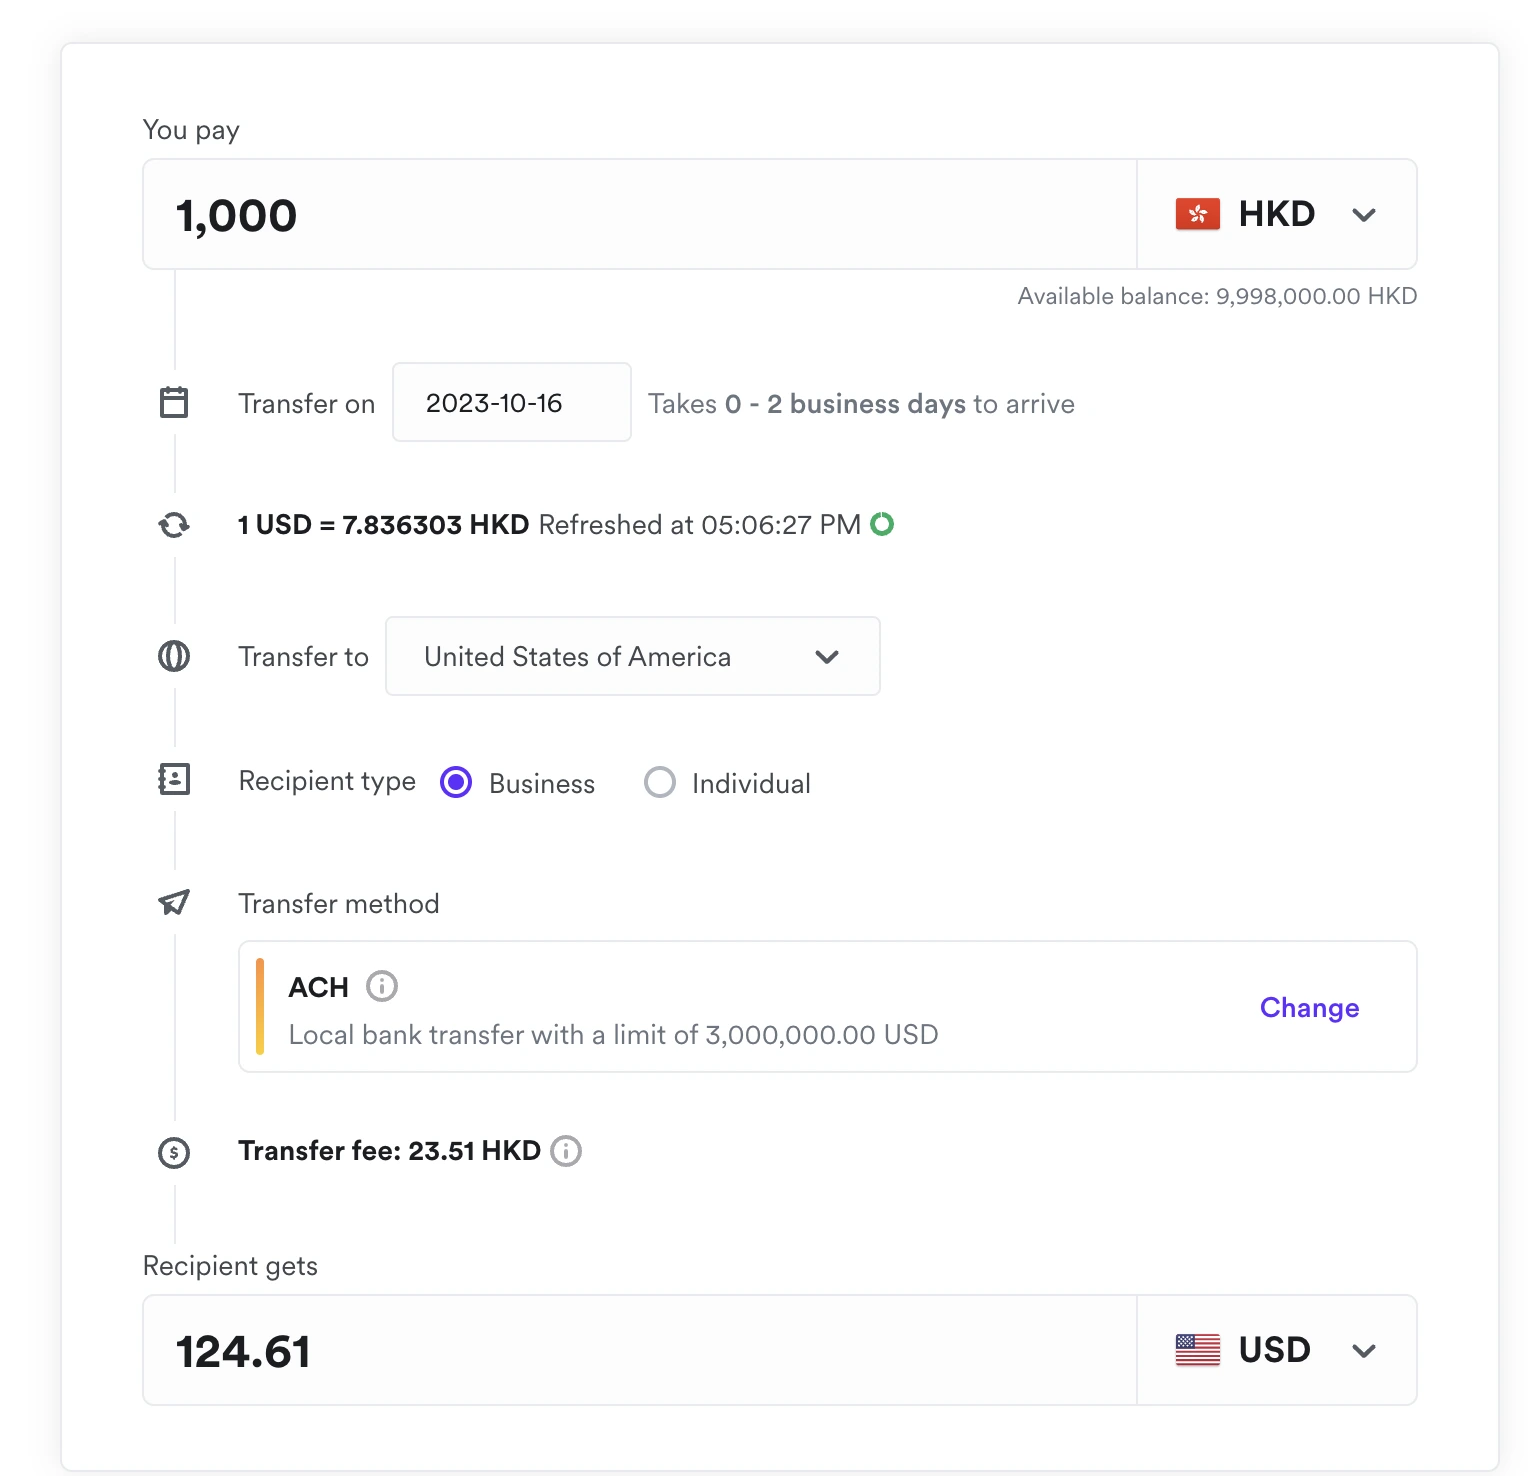
Let’s make this painfully practical. Imagine you’re in the US, you’ve hired a UK-based designer, and their invoice is in GBP.
- Create (or select) your USD wallet where your funds sit.
- Add the contractor as a beneficiary using the exact bank details they provided.
- Convert USD to GBP for the exact invoice amount (optionally add a small buffer).
- Send the GBP transfer with the invoice number as the payment reference.
- Save records: invoice PDF + transfer confirmation + reference.
Once you have done this end to end a single time, the process stops feeling unfamiliar and starts feeling routine. The key is accuracy, especially with beneficiary details and references, because small mistakes are what usually cause delays. After that, paying overseas contractors becomes a repeatable task rather than something you second-guess every month.
Getting paid by a foreign client using local bank details
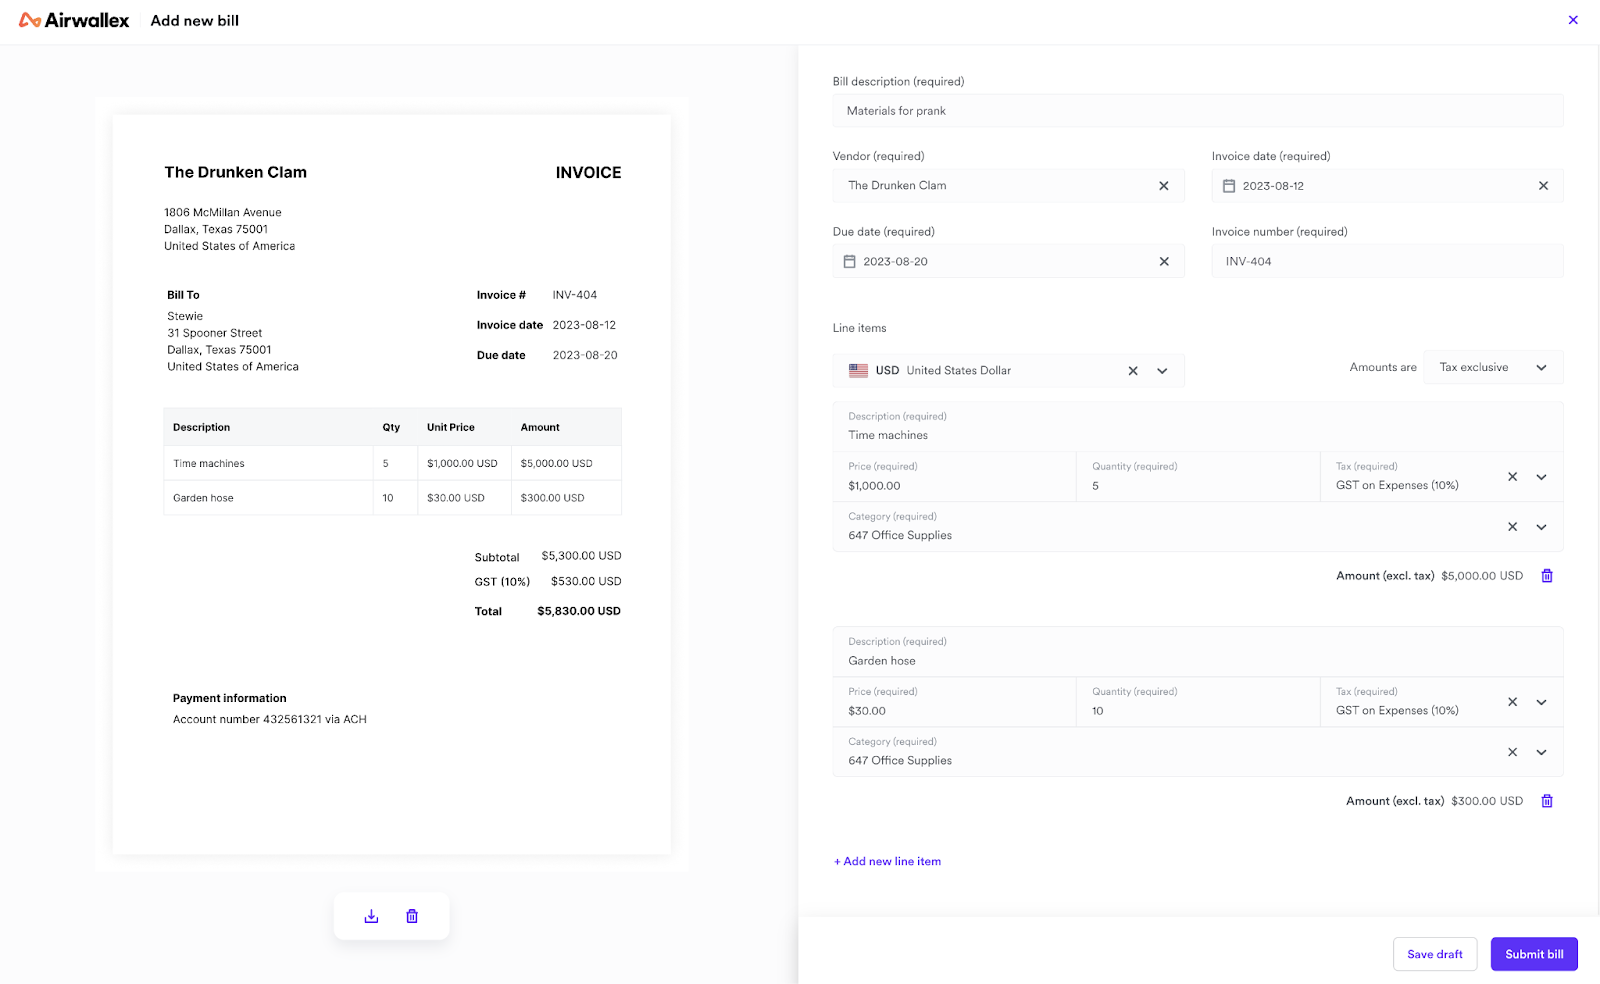
Assume a UK client wants to pay you without card fees and without “international wire drama”. Your goal is to provide clear instructions that reduce back-and-forth.
- Choose the receiving currency wallet (GBP for a UK client).
- Copy the receiving details and paste them into your invoice “Payment Instructions”.
- Require a reference (Invoice ID) and repeat it twice: once in the invoice body and once in the payment instructions.
- Reconcile when funds arrive: match reference + amount + client name.
Clear payment instructions do more than make life easier for your client, they protect your own time. When the currency, reference, and receiving details are unambiguous, payments arrive faster and are easier to reconcile.
Managing subscriptions with an Airwallex card (simple expense control)
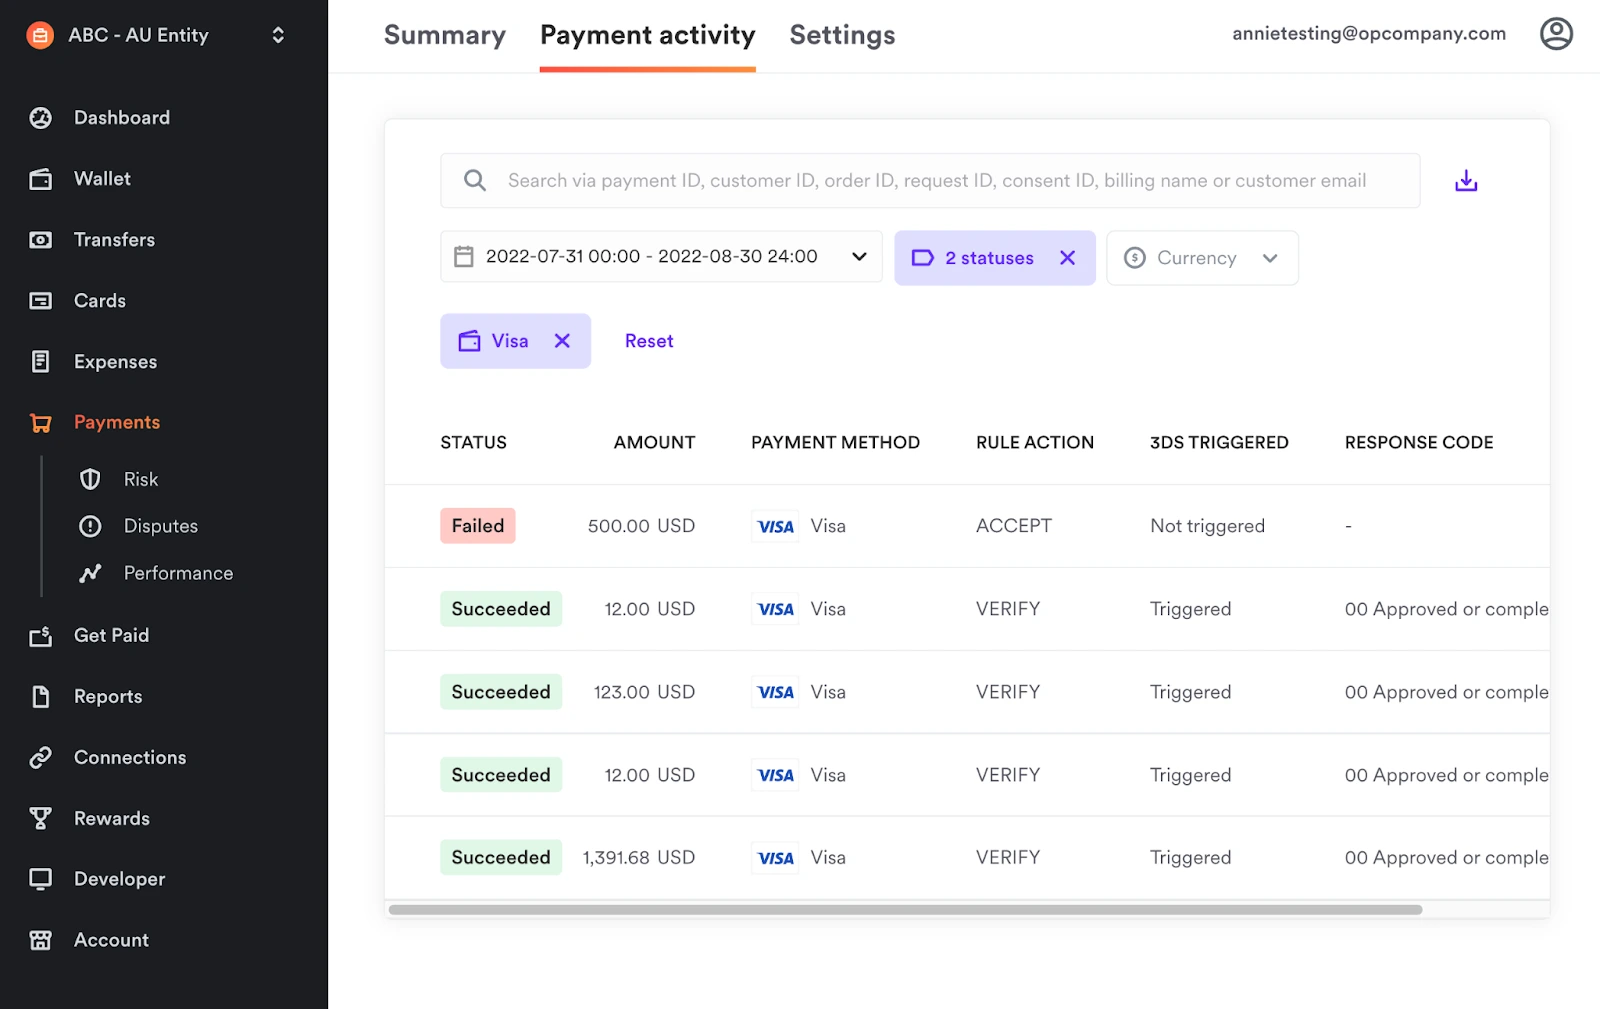
This is a small move with surprisingly big impact: create one card dedicated to subscriptions. It prevents “subscription creep” from sneaking into your margins.
- Create a virtual card named “SaaS Subscriptions”
- Set a monthly limit aligned with your budget
- Use it for recurring tools (email provider, hosting, CRM, analytics)
- Review transactions monthly and cancel what you don’t use
Centralizing subscriptions on a single card makes costs visible in a way spreadsheets rarely do. When every recurring charge shows up in one place, it becomes much easier to spot tools you no longer rely on or price increases that slipped by unnoticed.
Airwallex Pricing: the best plan for beginners
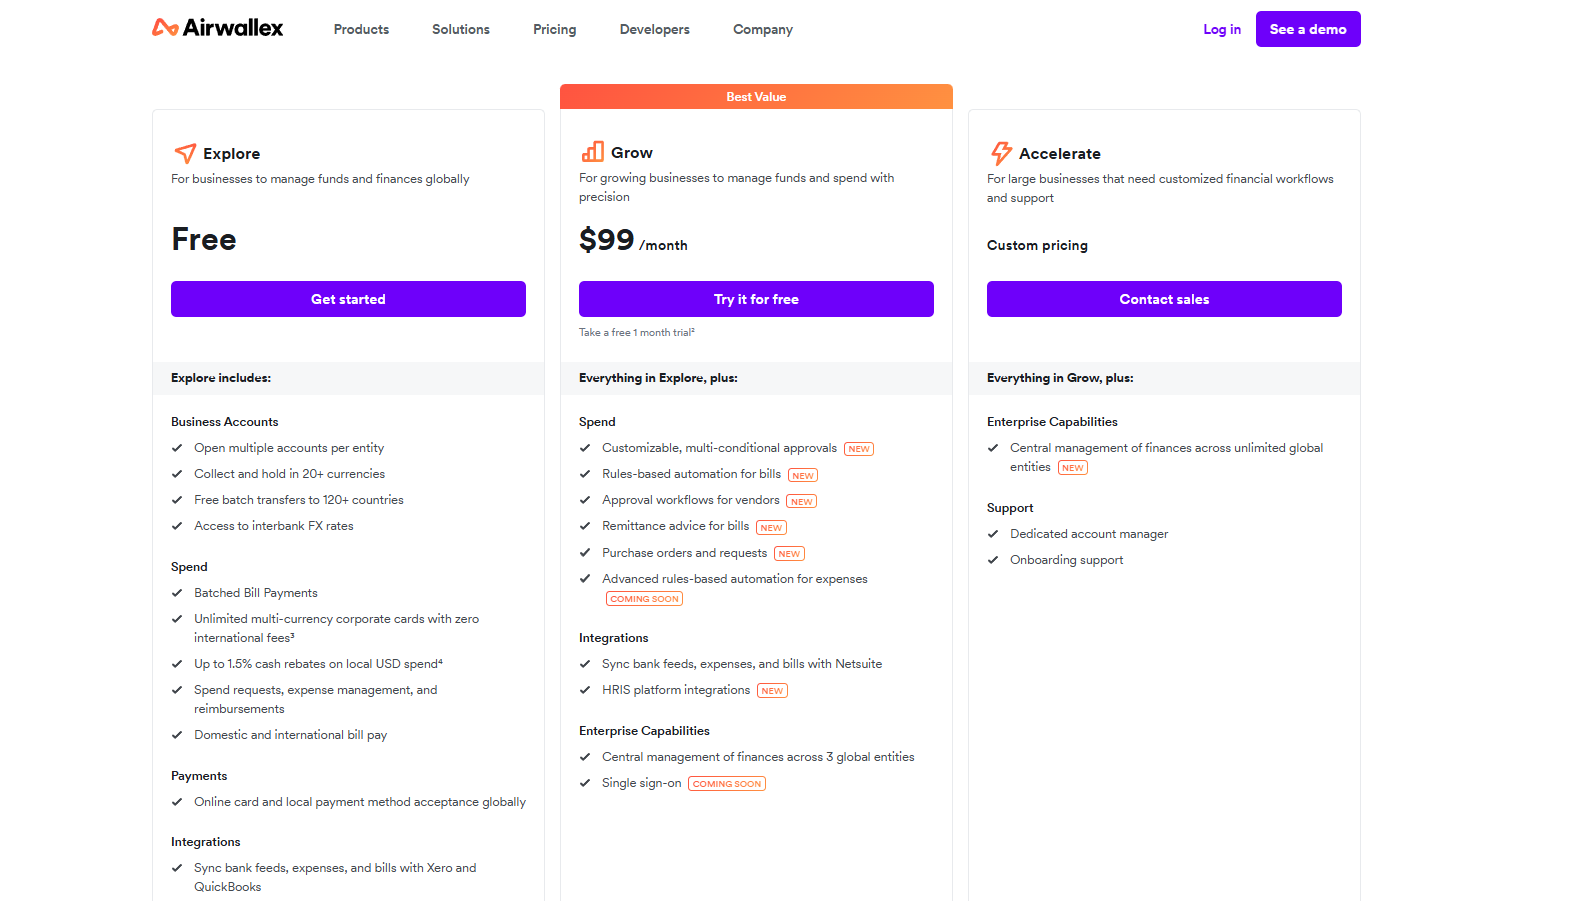
Pricing can be confusing because with fintech platforms you’re usually paying in two ways:
- Plan subscription fees (sometimes $0, sometimes a monthly tier)
- Transaction fees (FX, transfers, payment processing, and sometimes per active spend user for cards/spend features)
As of the current pricing information on Airwallex’s US site, Grow is listed at $99/month, and there’s also an Accelerate tier with custom pricing. Airwallex also notes that, in addition to any monthly fees, per-transaction fees can apply for FX, transfers, and payment processing.
Beginner recommendation: start with the lowest plan that gives you the operational basics you actually need (wallets + transfers). Then upgrade only when you’re hitting real complexity, like multi-approver workflows, deeper integrations (e.g., NetSuite), or larger team spend controls.
If you want to reduce initial costs, see the Airwallex promo code offer (cashback for eligible new clients).
Airwallex Tutorial: FAQ
Can I use Airwallex for personal use?
Not particularly, Airwallex was created for the use of businesses. Based upon Airwallex’s Eligibility Guide, they do not currently offer personal accounts to individual users; and, you will require an actively registered business in a qualified country to submit an application. If your usage is simply personal in nature, then a tool such as Wise or Revolut would likely be a better option for you depending upon your country and requirements.
Is Airwallex like Revolut?
They are both similar in terms of offering multi-currency + card capabilities, however, the experience differs considerably once you consider business workflows: approvals, expense management, payout options, and integrations. To help you decide which of these tools is best suited to your team spend + control needs, compare the two directly here: Airwallex vs Revolut.
Is Airwallex cheaper than Wise?
It will depend upon the exact route, payment type, and timing. The most accurate comparison will be a like-for-like quote: send currency = same, receive currency = same, amount = same, date = same. If FX is the primary consideration for you, use this comparison as a starting point: Wise vs Airwallex.
Is Airwallex better than Payoneer?
Your choice will be dependent upon your money flow. Payoneer is typically utilized for receiving payments from outside of your home country (and from specific marketplace providers) whereas Airwallex is generally positioned as a more comprehensive platform for companies looking to manage their multi-currency financial operations, including transferring funds and managing company spending. If you are receiving payments from various platforms, test the receiving process prior to making any additional comparisons, then judge all other factors.
What is the point of Airwallex?
The point is operational simplicity: holding multiple currencies, converting FX intentionally, sending international transfers, and managing company spend in one system. For small teams, that can mean fewer tools, fewer manual reconciliations, and less uncertainty around cross-border fees.
Is Airwallex free to use?
The purpose of Airwallex is to provide a more streamlined and simplified operational experience: holding numerous currencies, intentionally converting FX, sending international transfers, and managing company spending within a single platform. For small teams, that means utilizing fewer tools, manually reconciling fewer items, and having reduced uncertainty surrounding cross border fees.
Can I trust Airwallex?
Even if a platform has a very low or even $0 entry cost, international finance is never "free" in the literal sense; there are costs associated with FX, transfers, and payment processing. Airwallex's Pricing Pages detail that transaction fees may exist (FX, transfers, payment processing) and some plans include monthly fees. Please review the current fee schedule for your region prior to committing.
Your first international payment, without the stress
After you've done all of the basic steps to set up your account (verify your account; open the correct wallets; add a recipient; and do your first test transfer), the idea that international payments are a mystery that is filled with fees will go away. Instead, international payments will be viewed as an easily repeated process: receive money; convert at your discretion; pay out cleanly; keep track of records.
What usually changes at this point is not just confidence, but behavior. You stop rushing conversions or second-guessing transfers, because you can see each step clearly and repeat it the same way every time.
If you’re getting started right now, I’d use the deal link so you can check whether you qualify for a discount before you sign up: Airwallex promo code and discounts.
{{cta-marketplace="/blog-elements"}}